Create a Webhook
This guide walks you through setting up a Stripe webhook to receive payment completion events in your LearningFlow Enterprise Portal.
Overview
Webhooks allow Stripe to send real-time notifications to your LearningFlow Enterprise Portal when payment events occur. This integration is essential for automatically processing checkout.session.completed events.
Prerequisites
- Access to your Stripe Dashboard
- Access to your LearningFlow Enterprise Portal
- Admin or Super Admin permissions in LearningFlow
Step-by-Step Instructions
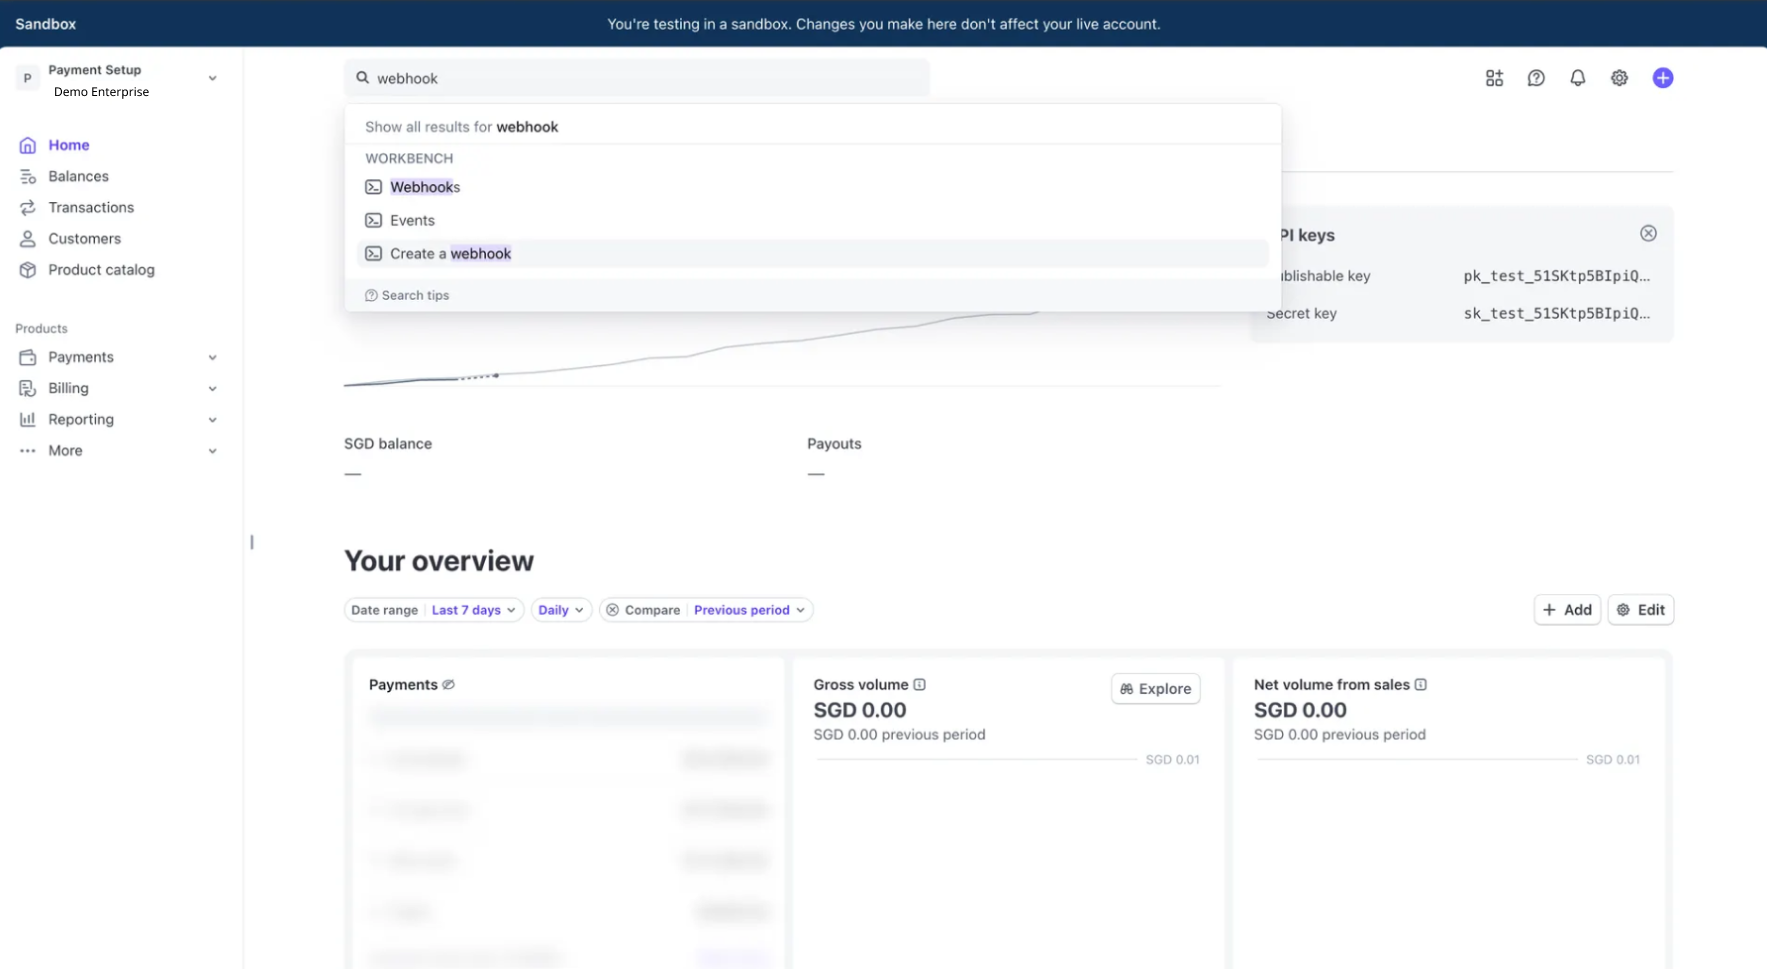
1. Navigate to Webhooks in Stripe
- Log in to your Stripe Dashboard
- In the search bar at the top, type "webhook"
- From the dropdown results, click on "Webhooks" under the CONNECTED section
- Click on "Create a webhook"
2. Choose the Event to Listen For
- On the "Select events" screen, you'll see a list of available Stripe events
- In the search box, type "checkout" to filter the events
- Locate and select only the following event:
- ✅
checkout.session.completed- Occurs when a Checkout Session has been successfully completed
- ✅
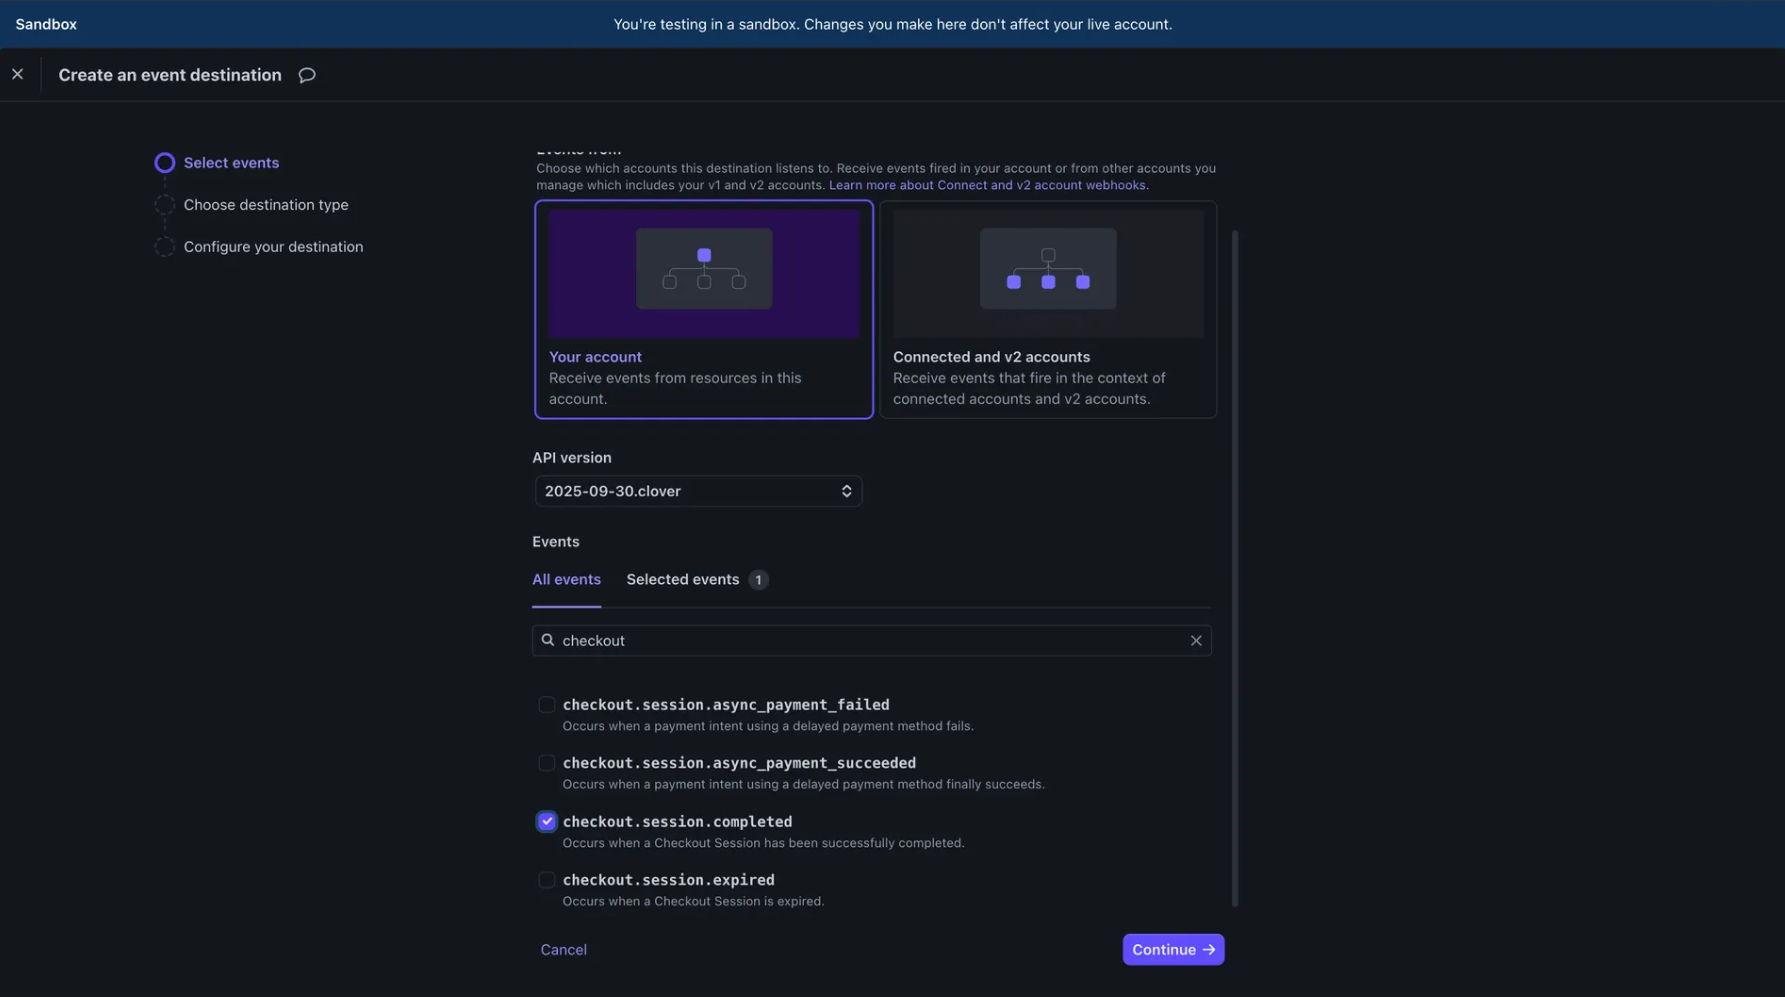
- Click "Continue" to proceed
3. Select Webhook Endpoint Option
-
In the "Create an event destination" dialog, you'll see two options:
- Webhook endpoint - Send webhook events to a hosted endpoint
- Amazon EventBridge - Send events to your AWS account
-
Select "Webhook endpoint"
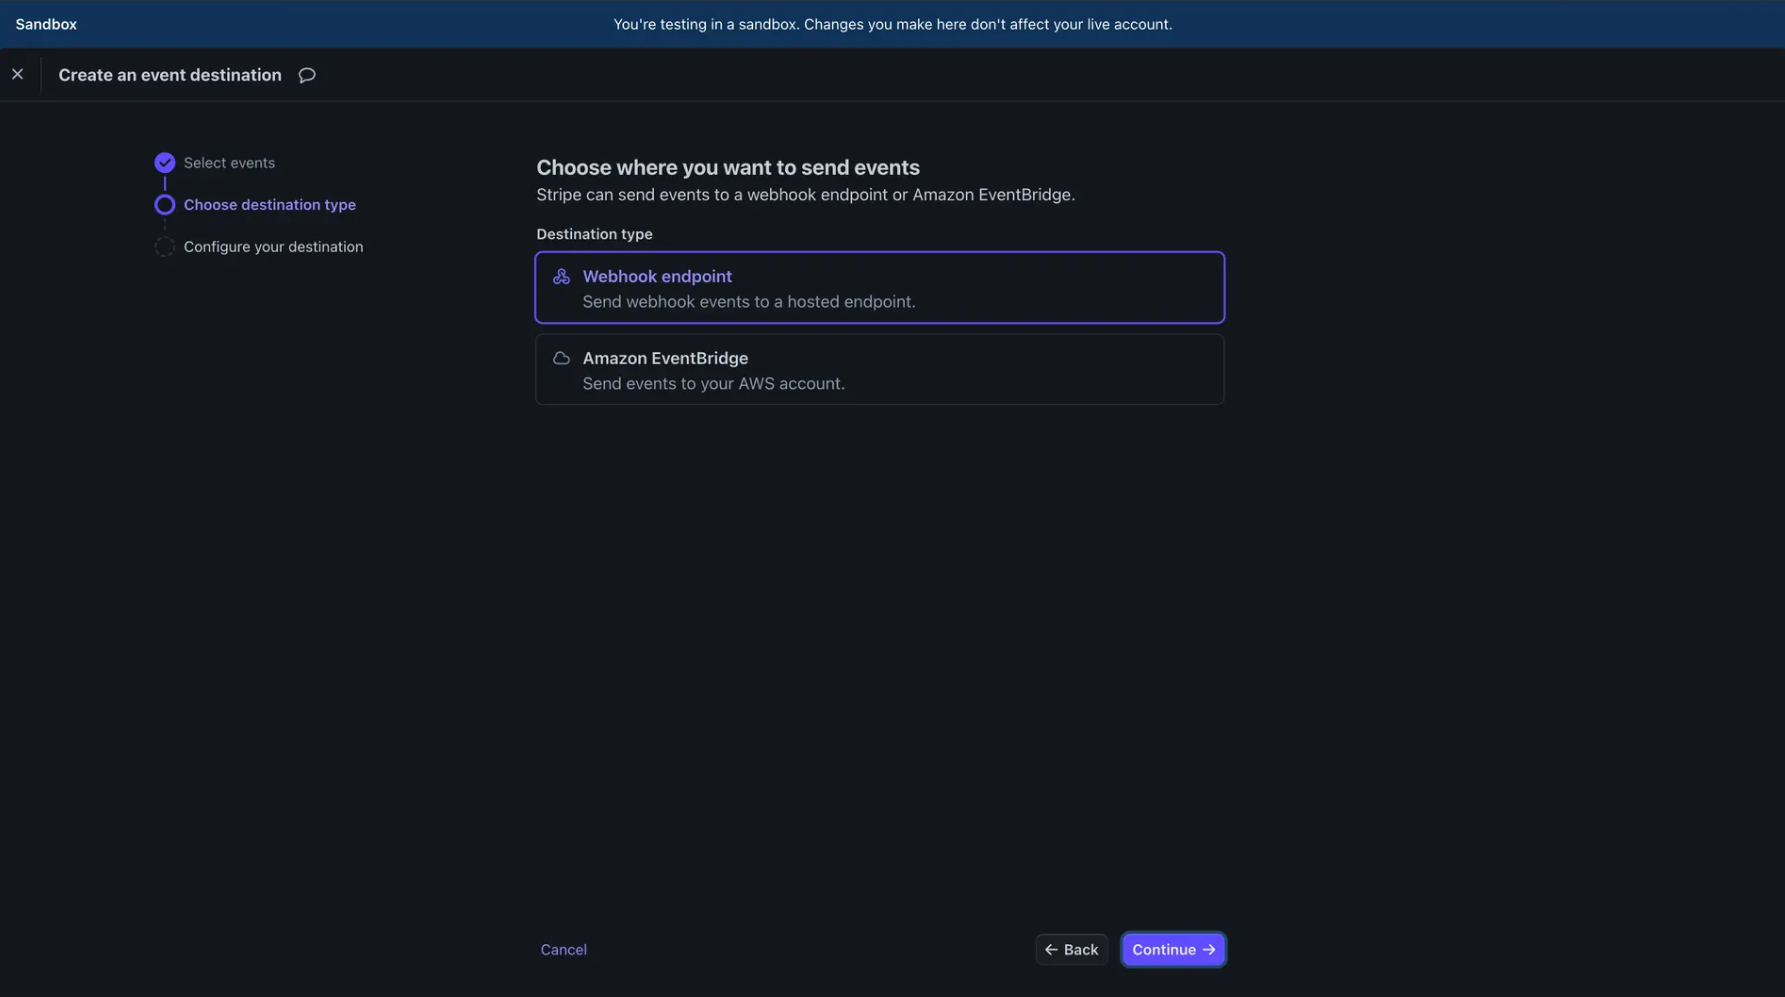
- Click "Continue" to proceed to the next step
4. Get the Webhook URL from LearningFlow
Before configuring the webhook destination in Stripe, you need to obtain the webhook URL from your LearningFlow Enterprise Portal.
- Open a new browser tab and navigate to your LearningFlow Enterprise Portal
- Go to Stripe Settings
- Scroll down to the "Webhook Configuration" section
- Locate the "Webhook URL" field
- Click the "Copy" button next to the URL to copy it to your clipboard
The webhook URL format will be:
https://api.learningflow.ai/api/stripe/webhook/enterprise/<YOUR_ORG_ID>

Note: Each organization has a unique webhook URL. Make sure you copy the correct URL for your organization.
5. Configure the Webhook Destination in Stripe
Now return to your Stripe Dashboard to complete the webhook setup.
-
On the "Configure your destination" screen, fill in the following fields:
Destination name (optional but recommended):
LearningFlow Custom payment webhookEndpoint URL (required):
- Paste the webhook URL you copied from the LearningFlow Enterprise Portal
- Example:
https://api.learningflow.ai/api/stripe/webhook/enterprise/<YOUR_ORG_ID>Description (optional):
LearningFlow Custom payment webhook
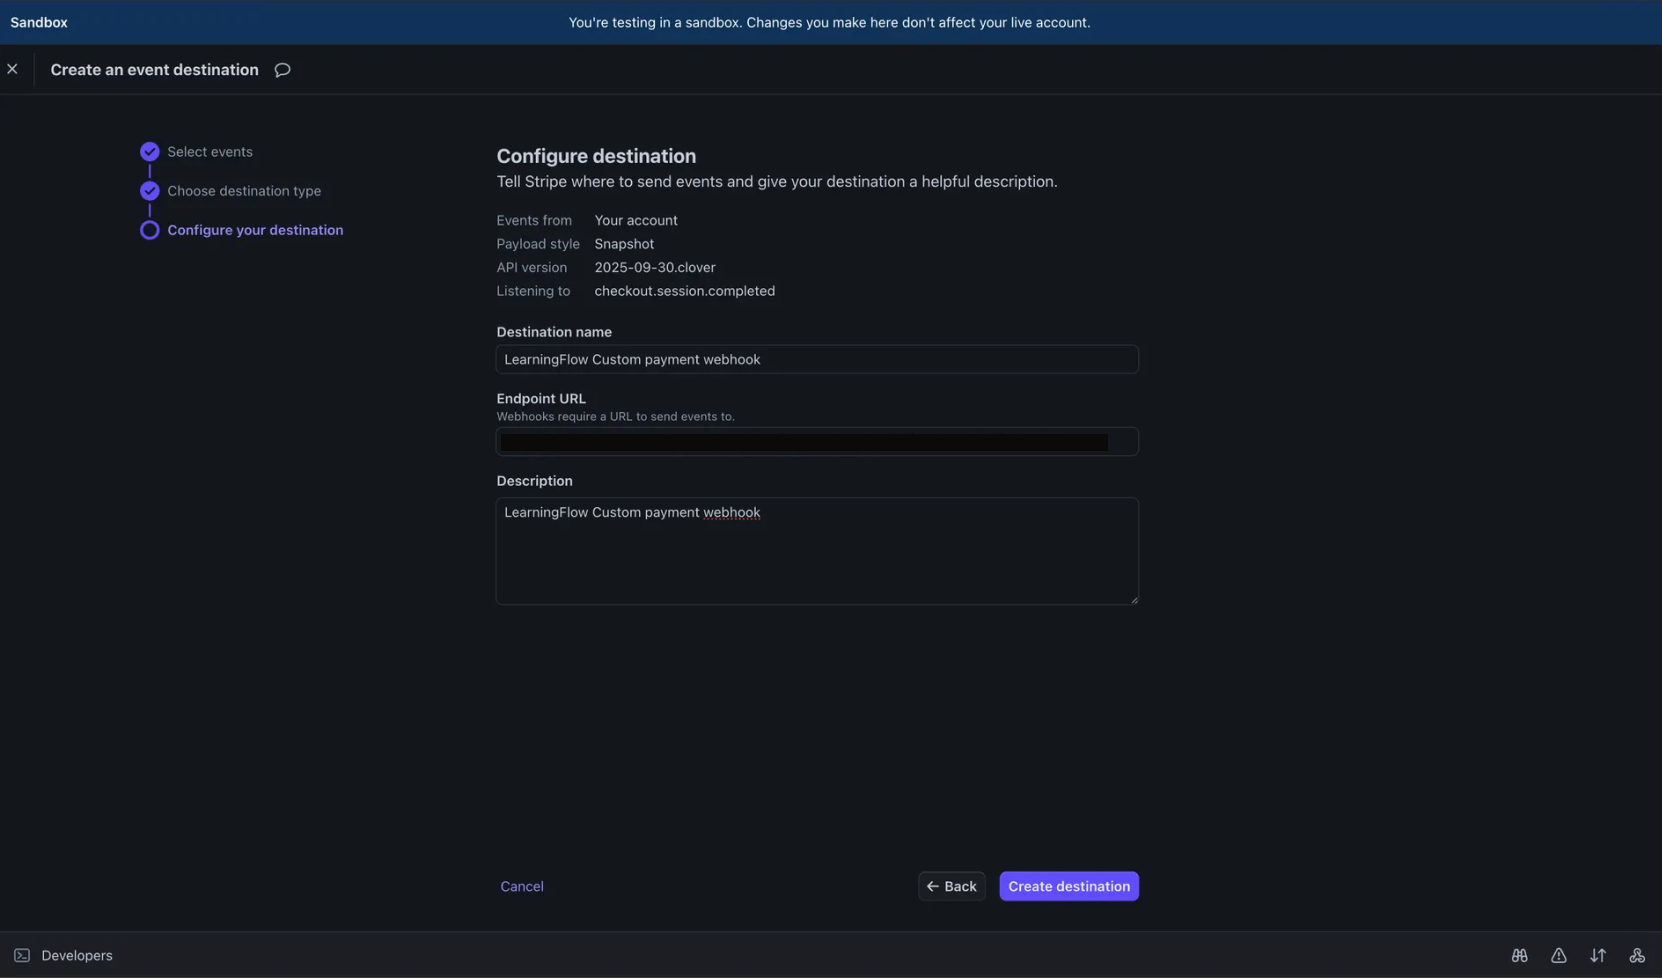
- Click "Create destination" to complete the setup
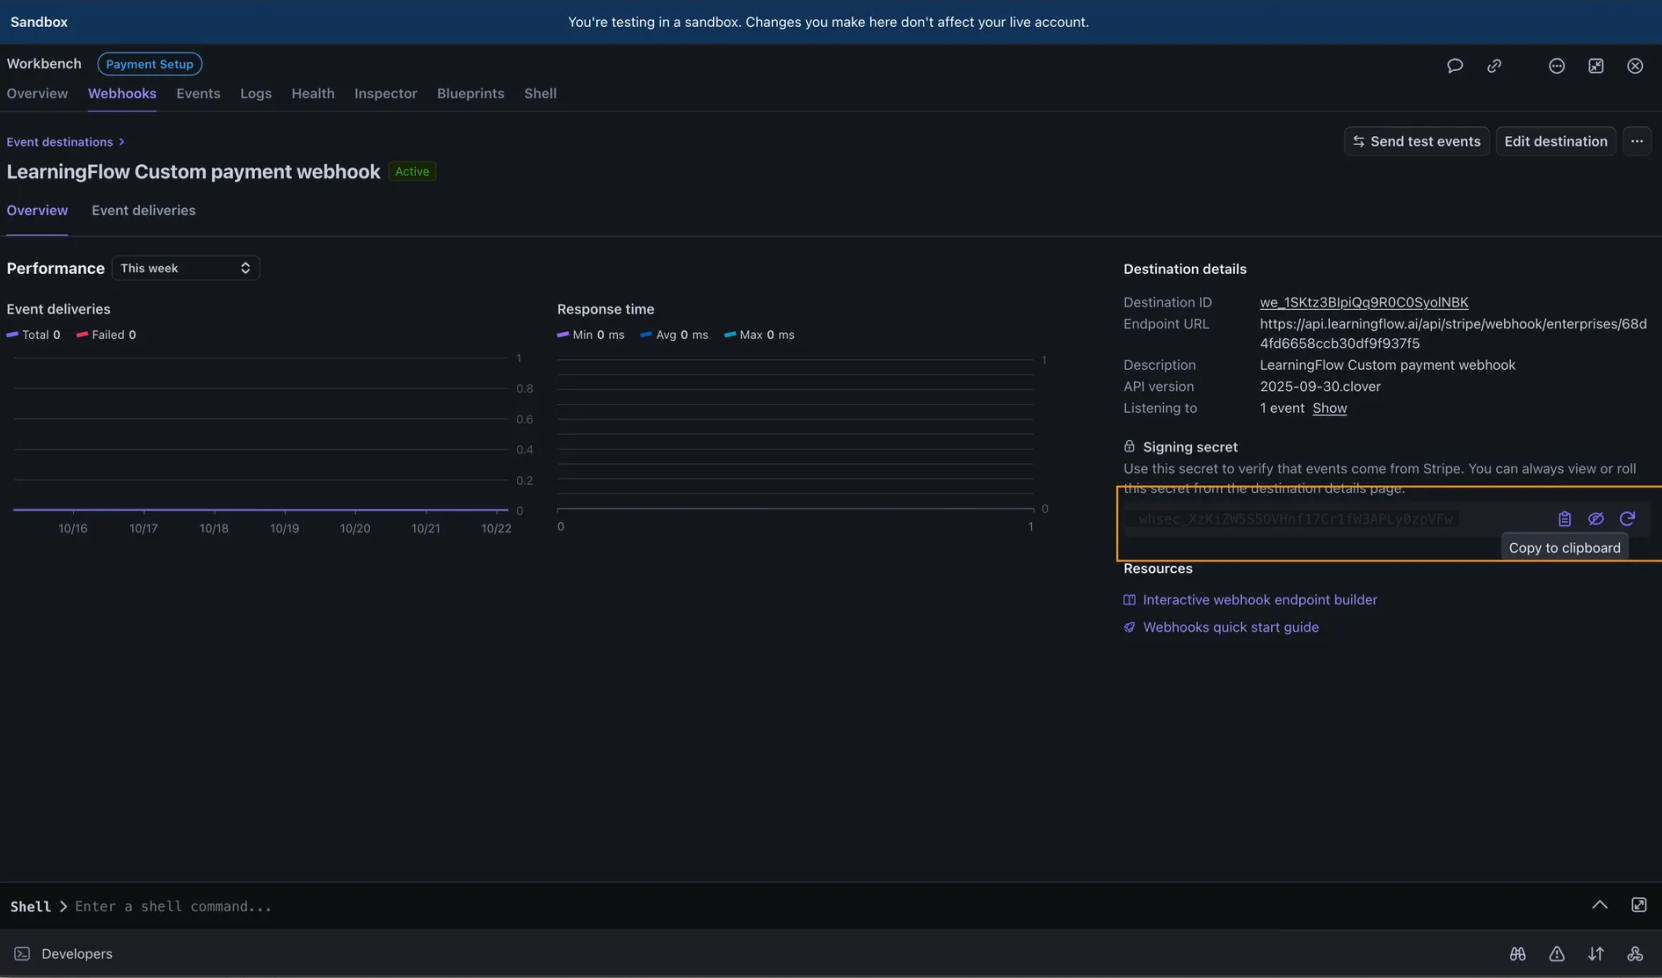
6. Copy the Webhook Signing Secret
After the webhook is created, you need to copy the webhook signing secret.
In the "Signing secret" section on the right side of the page, you'll see:
- A masked secret value (e.g.,
whsec_XXXDwXS5Wmlnt37Gc1nfJA9SLy8zguxT) - A "Copy to clipboard" button
Click the "Copy to clipboard" button to copy the signing secret
Next Step: Keep this signing secret secure. The secret key need to be configured in your LearningFlow Enterprise Portal. Go to Stripe Settings to configure the webhook signing secret.