Create Stripe API Key
This guide walks you through creating a restricted API key in Stripe for use with LearningFlow's Enterprise Portal payment integration.
Prerequisites
- Access to your Stripe account
- Administrator permissions in Stripe
Steps to Create API Key
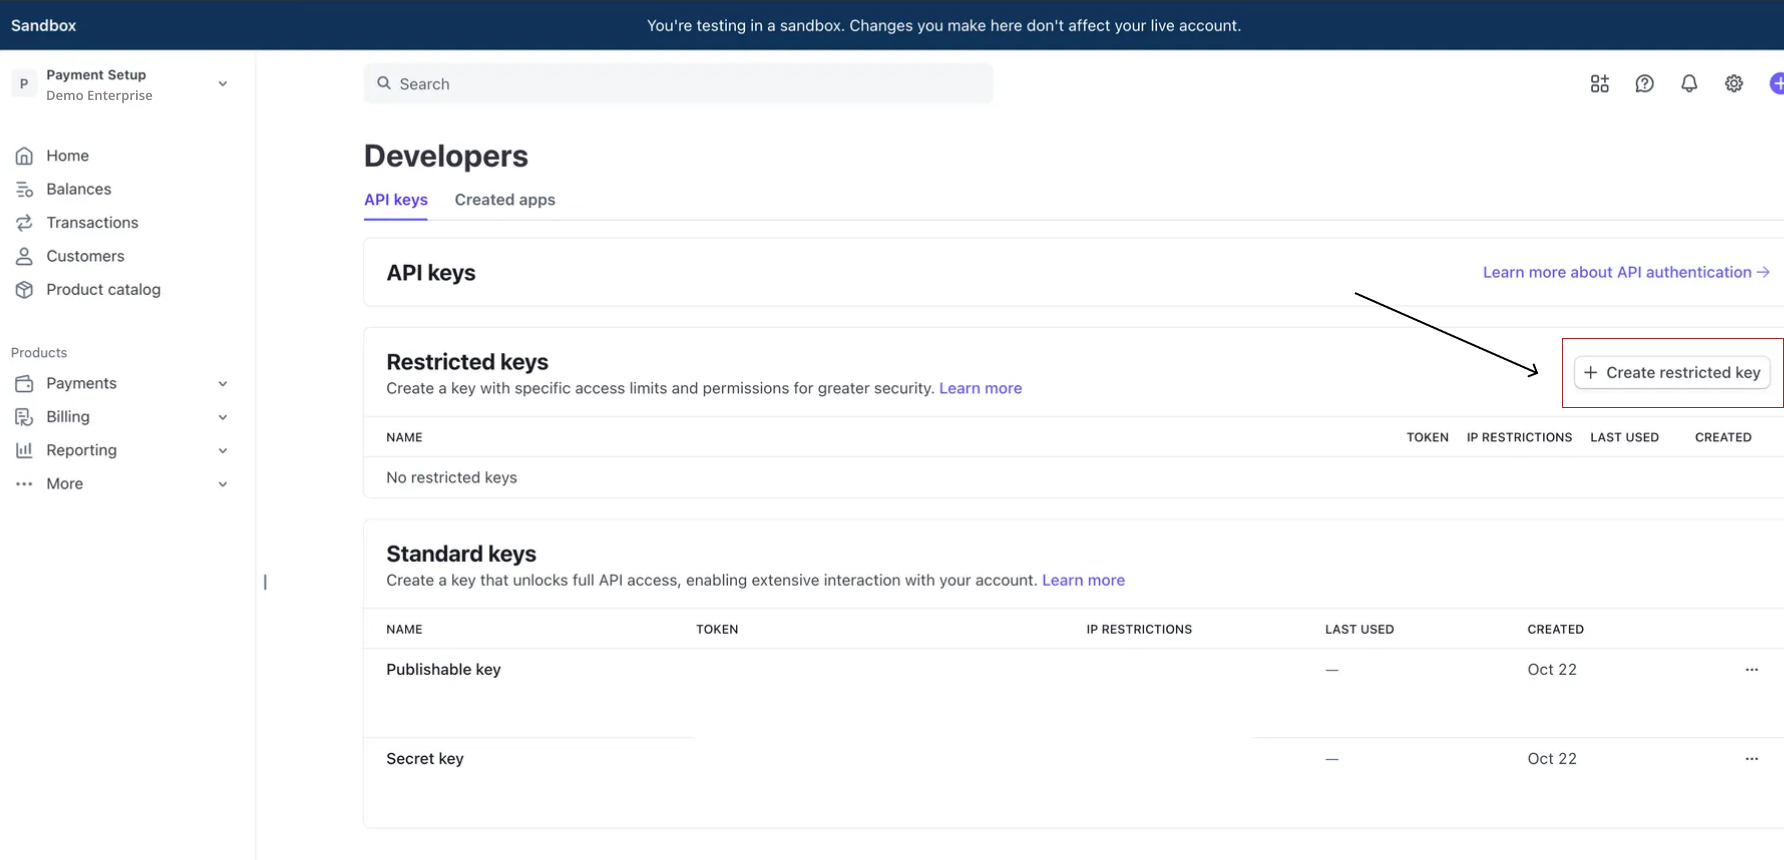
1. Navigate to API Keys
- Log in to your Stripe Dashboard
- Use the search bar and type "api"
- Click on Developers > API keys from the search results

2. Create a Restricted Key
- In the Restricted keys section, click + Create restricted key
- Give your key a descriptive name (e.g., "LearningFlow Integration")
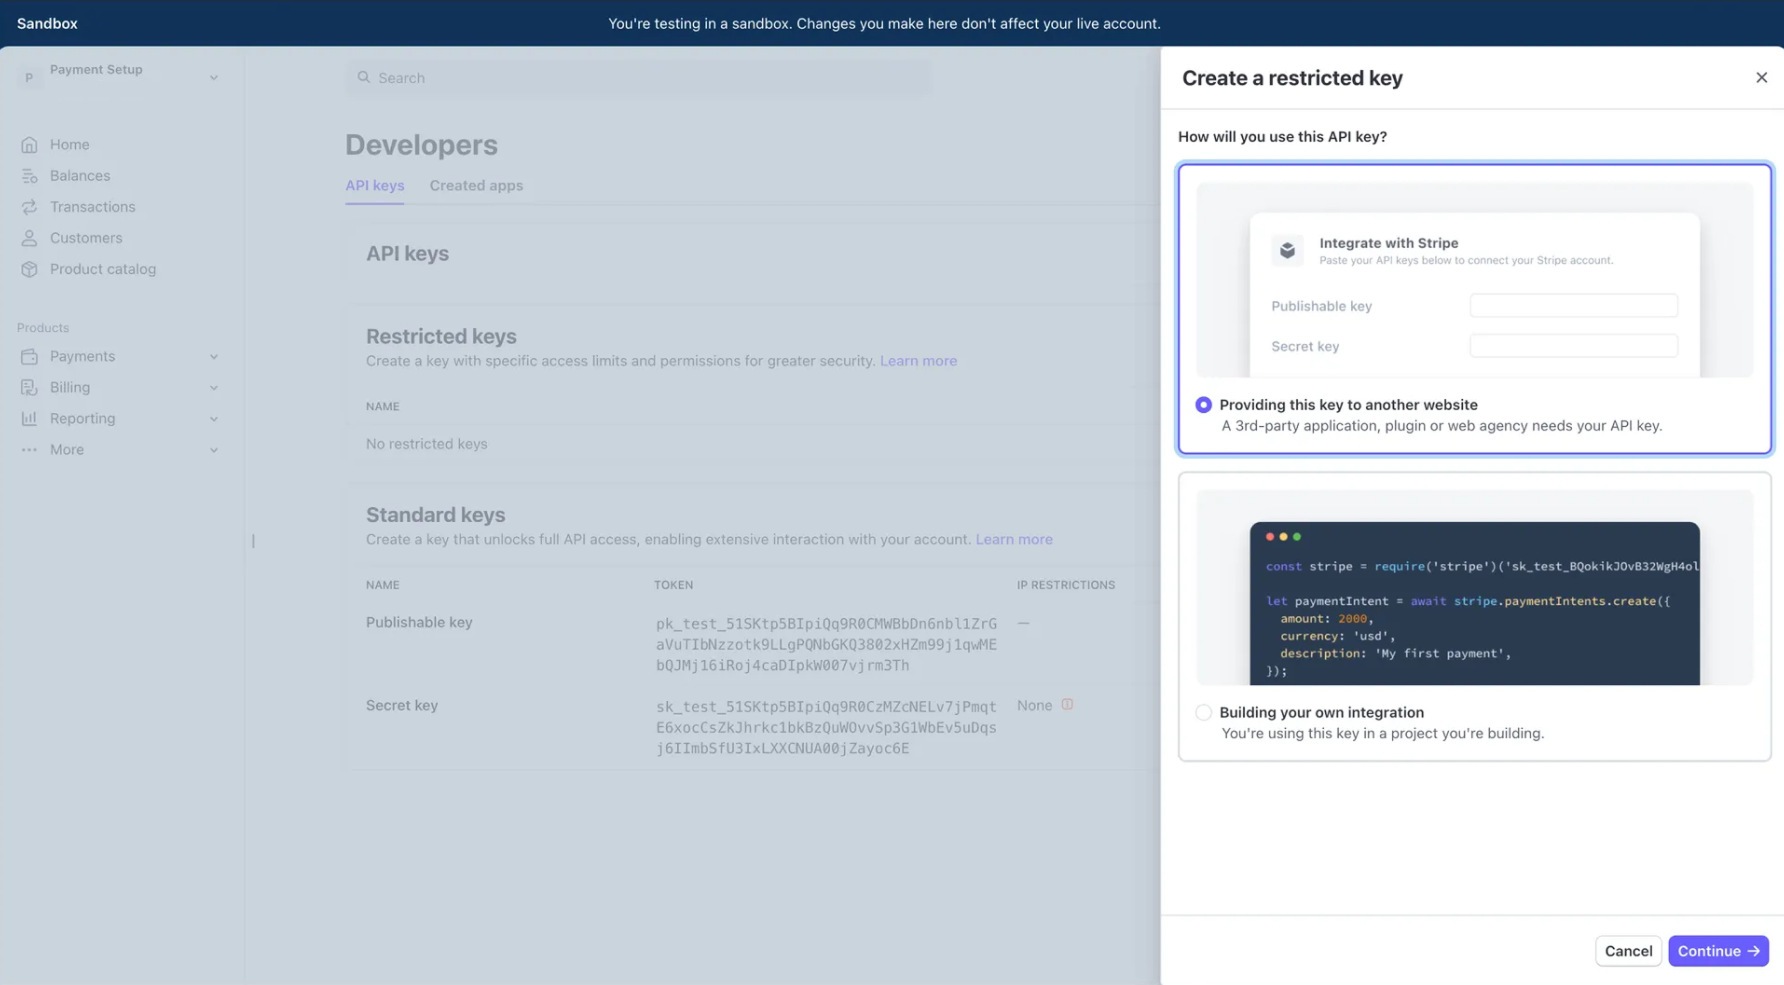
3. Select Key Usage Type
To create the a restricted API key, select Providing this key to another website
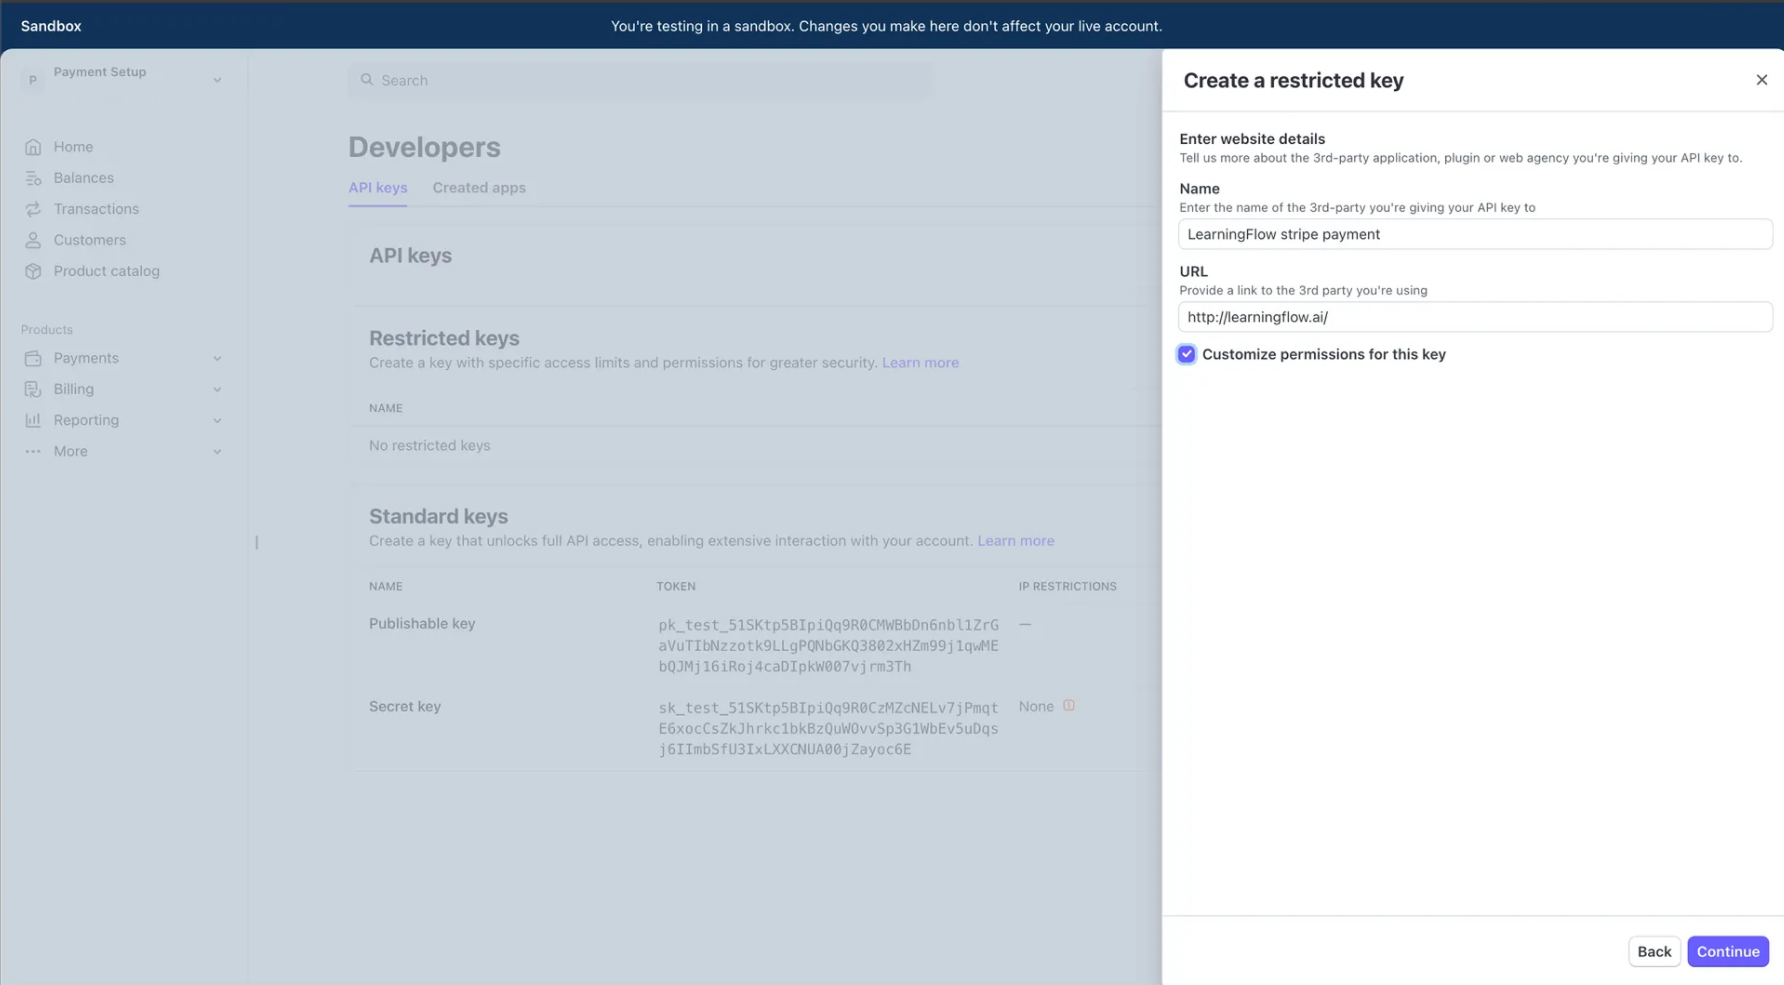
4. Add Website Details
Fill the URL → https://api.learningflow.ai
Tick → Customize permissions for this key
OPTIONAL (stripe already gave required permissions)
| Resource | Permission Level |
|---|---|
| Checkout Sessions | Write |
| Products | Write |
| Invoices | Read |
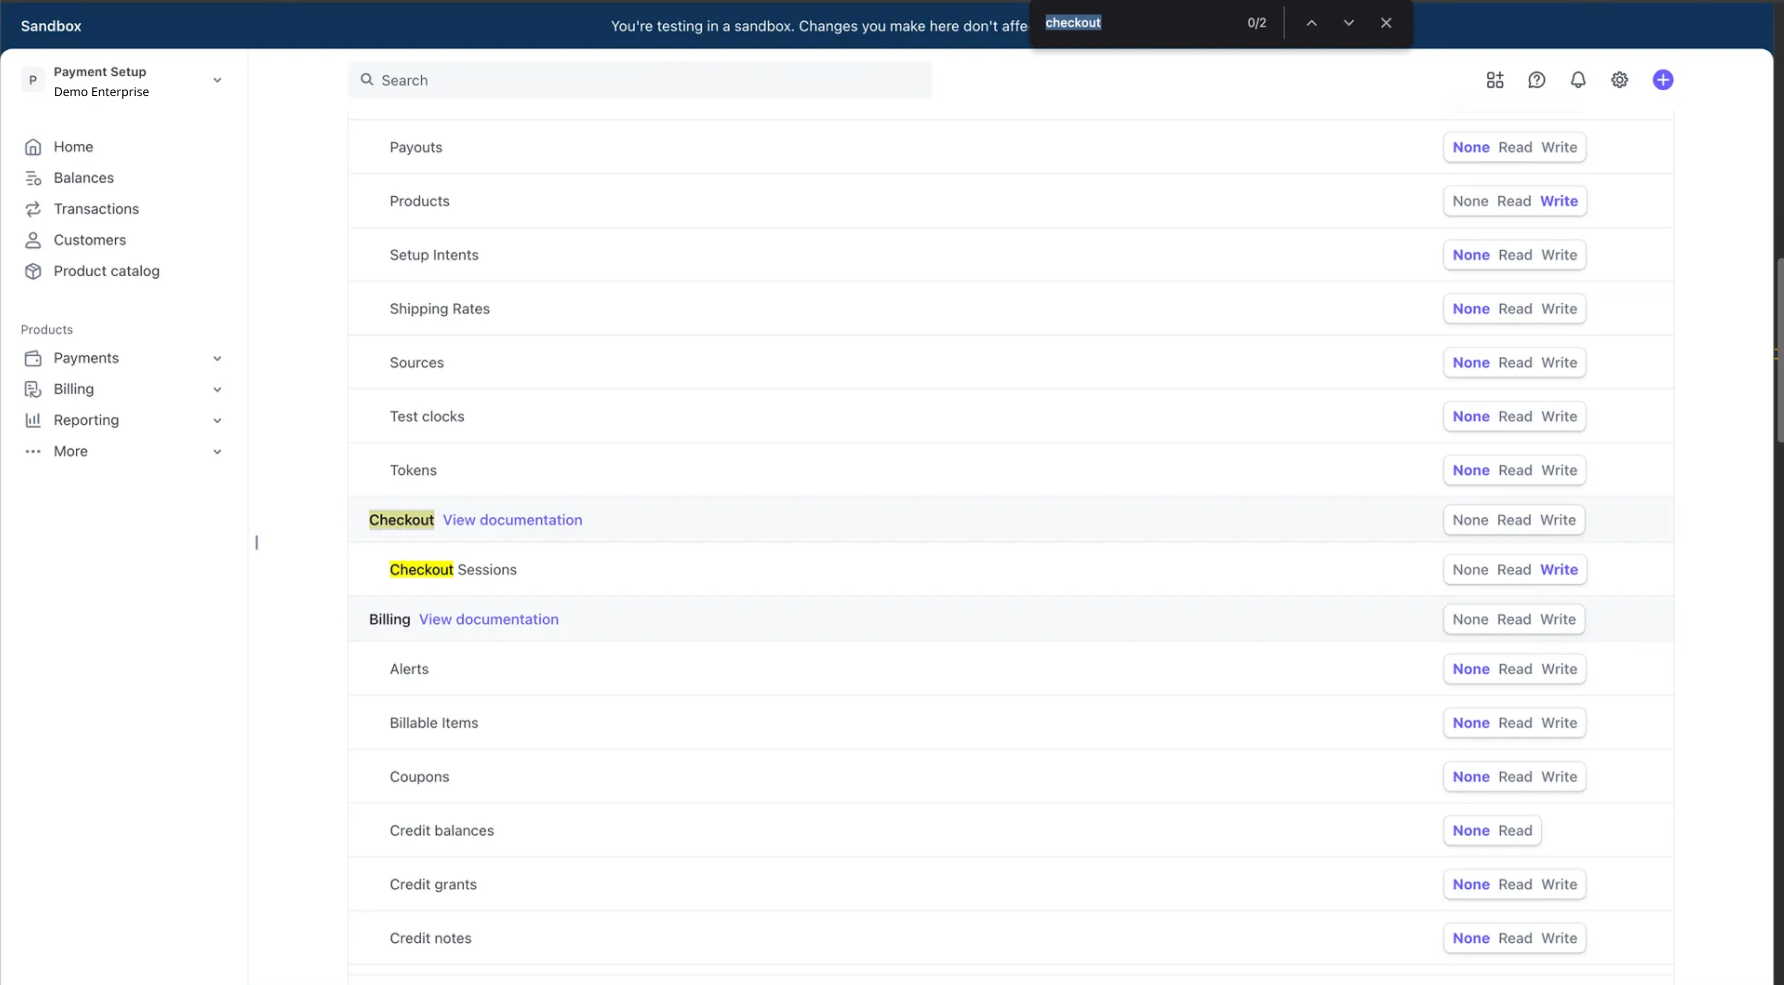
Optional Permissions
Stripe provides these permissions by default for restricted keys. You can turn off other permissions that are not needed. LearningFlow only requires the three permissions listed above.
5. Save and Copy the API Key
- Click Create key to generate your restricted API key
- Important: Copy the secret key immediately - it will only be shown once
- Store the key securely (you'll need it for the Enterprise Portal configuration)

Security Best Practice
Never share your API keys publicly or commit them to version control. Treat them like passwords.
Next Steps
After creating your Stripe API key:
- Navigate to your Enterprise Portal Payment Settings
- Configure Stripe as your payment provider
- Paste the API key you just created
- Test the integration with a test transaction
Related Documentation
Support
Need help with Stripe integration? [Contact our learningflow team] for assistance.