Stripe Settings
Configure Stripe payment processing for your enterprise to enable direct credit purchases by users. This guide covers the complete setup process including API configuration and webhook integration.
Prerequisites
Before configuring Stripe in LearningFlow:
- Active Stripe account (sign up at stripe.com)
- Administrator access to your Stripe Dashboard
- Stripe API keys
- Stripe webhook configured
If you haven't set up your Stripe API keys and webhook yet, follow our guides:
Configuration Steps
Step 1: Access Stripe Settings
- Log in to the Enterprise Portal
- Navigate to Stripe Settings
- Click "Manage Settings" on the Stripe card
- You'll be redirected to the Stripe Integration page
Step 2: Configure API Keys
The Stripe Integration page has two main sections: API Configuration and Webhook Configuration.
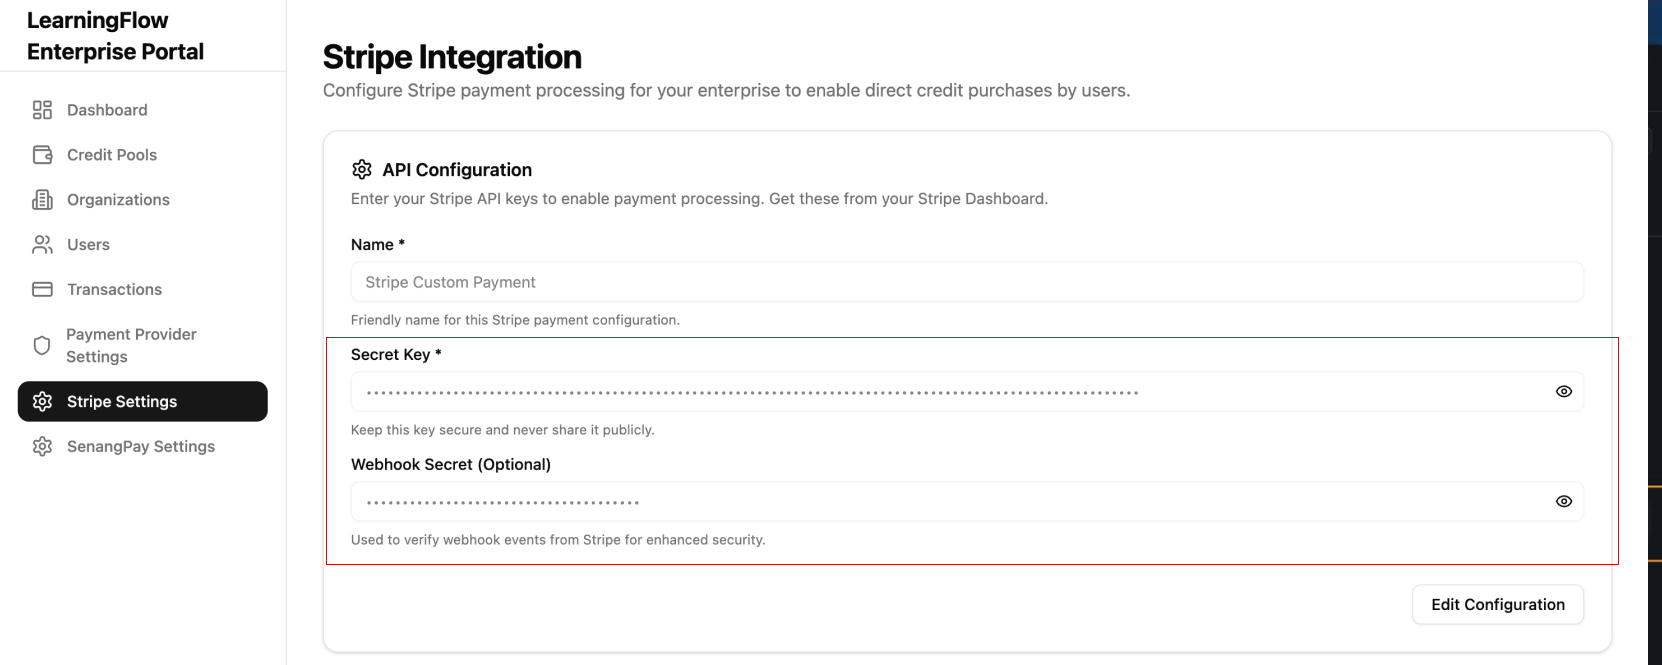
API Configuration
Enter your Stripe API keys to enable payment processing:
-
Name (Required)
- Enter a friendly name for this Stripe payment configuration
- Example: "Stripe Custom Payment B"
- This helps you identify different Stripe configurations if you manage multiple
-
Secret Key (Required)
- Enter your Stripe API secret key
- Format:
sk_test_...(test mode) orsk_live_...(live mode) - Get this from your Stripe Dashboard
- Click the eye icon (👁️) to toggle visibility while entering
Keep this key secure and never share it publicly. This key has write access to your Stripe account.
- Webhook Secret (Optional)
- Enter your webhook signing secret for enhanced security
- Format:
whsec_... - Used to verify webhook events from Stripe for enhanced security
- Recommended for production environments
Testing Your Integration
After configuration, test the integration to ensure everything works correctly:
Test Mode vs Live Mode
-
Test Mode: Use test API keys (starting with
sk_test_)- Use Stripe test card numbers
- No real money is processed
- Recommended for initial setup
-
Live Mode: Use live API keys (starting with
sk_live_)- Real payments are processed
- Use only after successful testing
Test a Payment
-
Navigate to Credit Pools in the Enterprise Portal
-
Attempt to purchase credits as a test user
-
Use a Stripe test card:
- Card number:
4242 4242 4242 4242 - Expiry: Any future date
- CVC: Any 3 digits
- ZIP: Any 5 digits
- Card number:
-
Complete the checkout process
-
Verify:
- Payment appears in LearningFlow transactions
- Credits are added to the user's account
- Transaction appears in Stripe Dashboard
- Webhook event is received (check Stripe webhook logs)
Related Documentation
- Create Stripe API Key - Step-by-step guide to creating API keys
- Payment Provider Settings - Overview of all payment providers
- Credit Pools - Managing credit allocation
- Transactions - Viewing payment history