Comment Node
The Comment Node is a visual annotation tool for workflow documentation and organization. It allows you to add colored text boxes with notes, instructions, explanations, or reminders directly in your workflow canvas. Comment nodes are visible only in the editor and do not appear to end users during workflow execution. They are essential for collaboration, documentation, and maintaining organized, understandable workflows.

Basic Usage
Use the Comment Node to add notes, explanations, or documentation to your workflow. These comments help you and other workflow designers understand the purpose, logic, or requirements of different parts of the workflow.
Inputs
The Comment Node does not have input ports. It is a standalone annotation element that does not participate in data flow or execution.
Outputs
The Comment Node does not have output ports. It exists purely for documentation purposes and does not affect workflow execution or data flow.
Configuration
Text Area
Large Text Field: Write notes, explanations, or documentation.
Features:
- Multi-line text support
- Can contain any text content
- Resizable text area
- Markdown-style formatting (displayed as plain text)
- No character limits
Example Content:
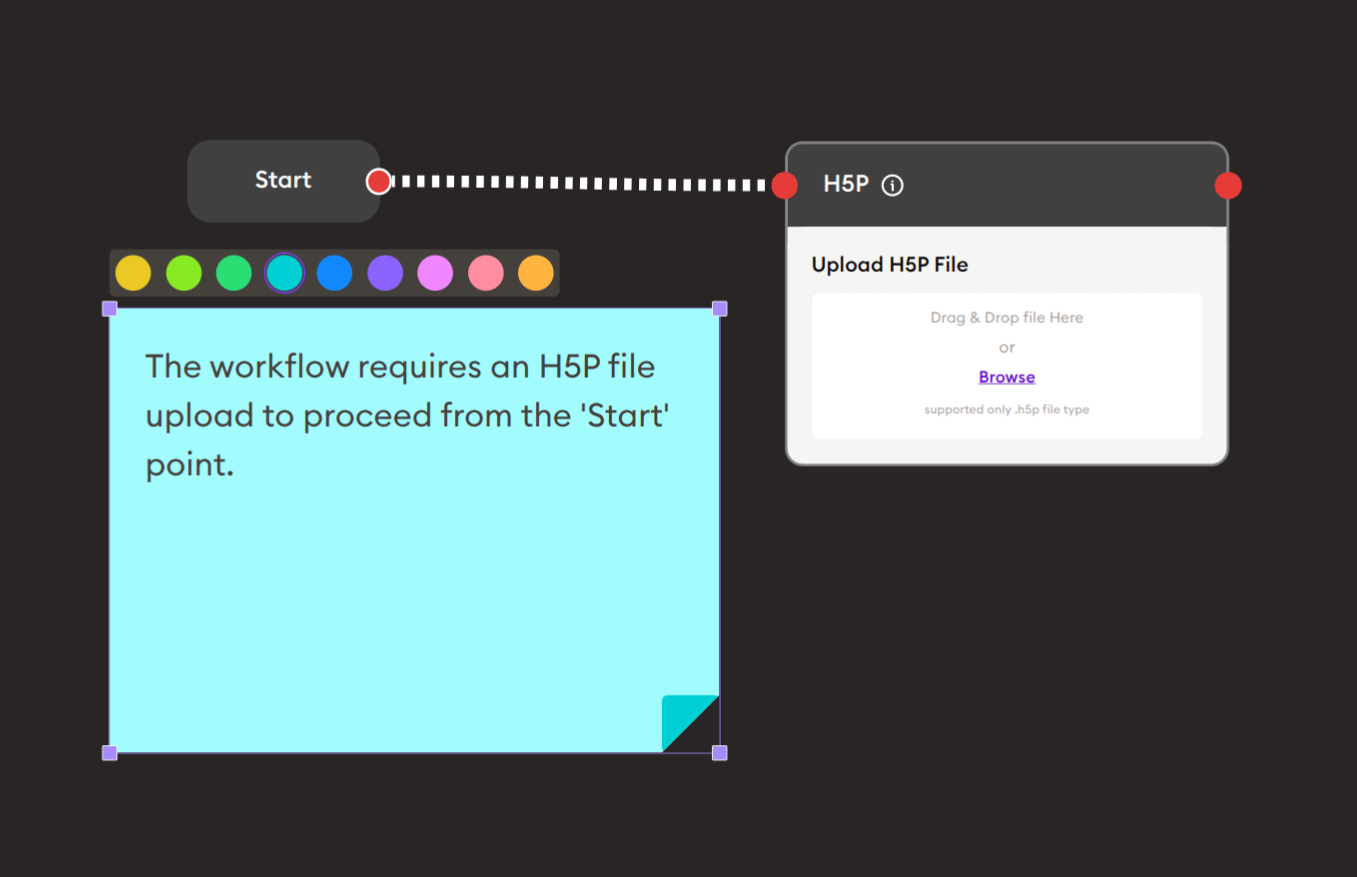
The workflow requires an H5P file upload to proceed
from the 'Start' point.
Common Uses:
- Workflow requirements
- Step-by-step explanations
- TODO items and reminders
- Business logic documentation
- Collaboration notes
- Version change notes
Color Selection
Color Palette: Choose from multiple color options to categorize or highlight comments.
Available Colors:
- 🟡 Yellow: Warnings, cautions, important notes
- 🟢 Green: Success states, completed items, approvals
- 🟢 Teal/Mint: General information, neutral notes
- 🔵 Cyan/Turquoise: Instructions, requirements, specifications
- 🔵 Blue: Technical details, system information
- 🟣 Purple: Special features, advanced functionality
- 🟣 Magenta: Review needed, questions, discussions
- 🔴 Pink: User-facing content, UI notes
- 🟠 Orange: Bugs, issues, needs attention
Color Strategy: Use consistent colors across your workflow:
- One color for requirements
- One color for explanations
- One color for TODOs
- One color for warnings
Resize Handle
Bottom-Right Corner: Drag to resize the comment box.
Features:
- Adjustable width and height
- Resize to fit content
- Make larger for visibility
- Make smaller to save space
- Maintains text content during resize
Example Workflows
Document Workflow Requirements
Scenario: Explain what's needed before workflow execution.
Steps to Create:
-
Add a Comment Node to the canvas.
-
Position it near relevant nodes:
- Drag to place above or beside nodes it describes
- Position for clear visual association
-
Select a color:
- Click color from palette (e.g., cyan for requirements)
-
Write your comment:
The workflow requires an H5P file upload to proceedfrom the 'Start' point. -
Resize if needed:
- Drag corner handle to adjust size
- Make visible but not obtrusive
Result: Clear documentation that explains workflow requirements to anyone viewing or editing the workflow.
Tips and Best Practices
1. Use Colors Consistently
Develop a color system:
Example Color System:
- 🟡 Yellow: Warnings and cautions
- 🟢 Green: Completed/approved sections
- 🔵 Cyan: Requirements and instructions
- 🔵 Blue: Technical documentation
- 🟣 Purple: Special features
- 🟣 Magenta: Needs review
- 🟠 Orange: TODOs and issues
- 🔴 Pink: User-facing notes
✓ Good:
All yellow comments = warnings
All orange comments = TODOs
All blue comments = technical notes
✗ Avoid:
Random colors with no meaning
Same color for everything
2. Position Strategically
Placement Guidelines:
- Place near nodes they describe
- Don't overlap important nodes
- Group related comments
- Use as section dividers
- Create visual hierarchy
✓ Good:
[Comment above node]
"This AI prompt generates quiz questions"
        ↓
    [AI Node]
✗ Avoid:
[Comment far away from relevant nodes]
[Comments blocking view of connections]
3. Keep Comments Concise
Be clear and brief:
✓ Good:
"Validates email format before sending.
Regex: /^[^\s@]+@[^\s@]+\.[^\s@]+$/"
✗ Avoid:
"This node is supposed to validate the email address
that the user entered in the previous form, and it
uses a regular expression to check if the format is
correct, and if it's not correct then it will show
an error message to the user asking them to try
again with a valid email address..."
4. Date Your Comments
Include timestamps for updates:
Format:
"Updated: 2025-11-27 by John
Previous: Used manual grading
Current: Uses AI feedback node"
5. Use for Requirements
Document prerequisites:
"REQUIREMENTS:
✓ Student must be logged in
✓ Course enrollment verified
✓ Assessment not expired
✓ Previous module completed"
6. Section Large Workflows
Break up complex flows:
[Comment: Wide, Cyan]
"═══ SECTION 1: AUTHENTICATION ═══"

[Workflow nodes...]

[Comment: Wide, Cyan]
"═══ SECTION 2: DATA COLLECTION ═══"

[More workflow nodes...]
7. Document Decisions
Explain why, not just what:
✓ Good:
"Using AI General Feedback instead of Display Quiz
because we need detailed rubric-based grading
for essay responses."
✗ Avoid:
"This is AI General Feedback node"
Related Nodes
Comment Nodes work alongside all other nodes but are particularly useful with:
- Complex Processing Nodes: Document AI prompts, API calls, data transformations
- Branching Nodes: Explain branching logic and conditions
- Start Node: Document workflow purpose and requirements
- Integration Nodes: Specify API details and error handling
- Custom Nodes: Explain special functionality
Summary
The Comment Node is essential for workflow organization and documentation:
✓ Visual: Colored notes directly on canvas
✓ Flexible: Any text content, any size
✓ Collaborative: Team communication and coordination
✓ Organized: Section headers and categorization
✓ Non-Intrusive: Editor-only, no user impact
Master the Comment Node to create well-documented, maintainable, and collaborative workflows that are easy for teams to understand, modify, and improve over time.