Video Input Node
The Video Input node allows users to upload video files directly into a workflow. This essential input node enables video processing, analysis, conversion, and integration workflows by capturing video content from users and making it available for subsequent processing steps.
Basic Usage
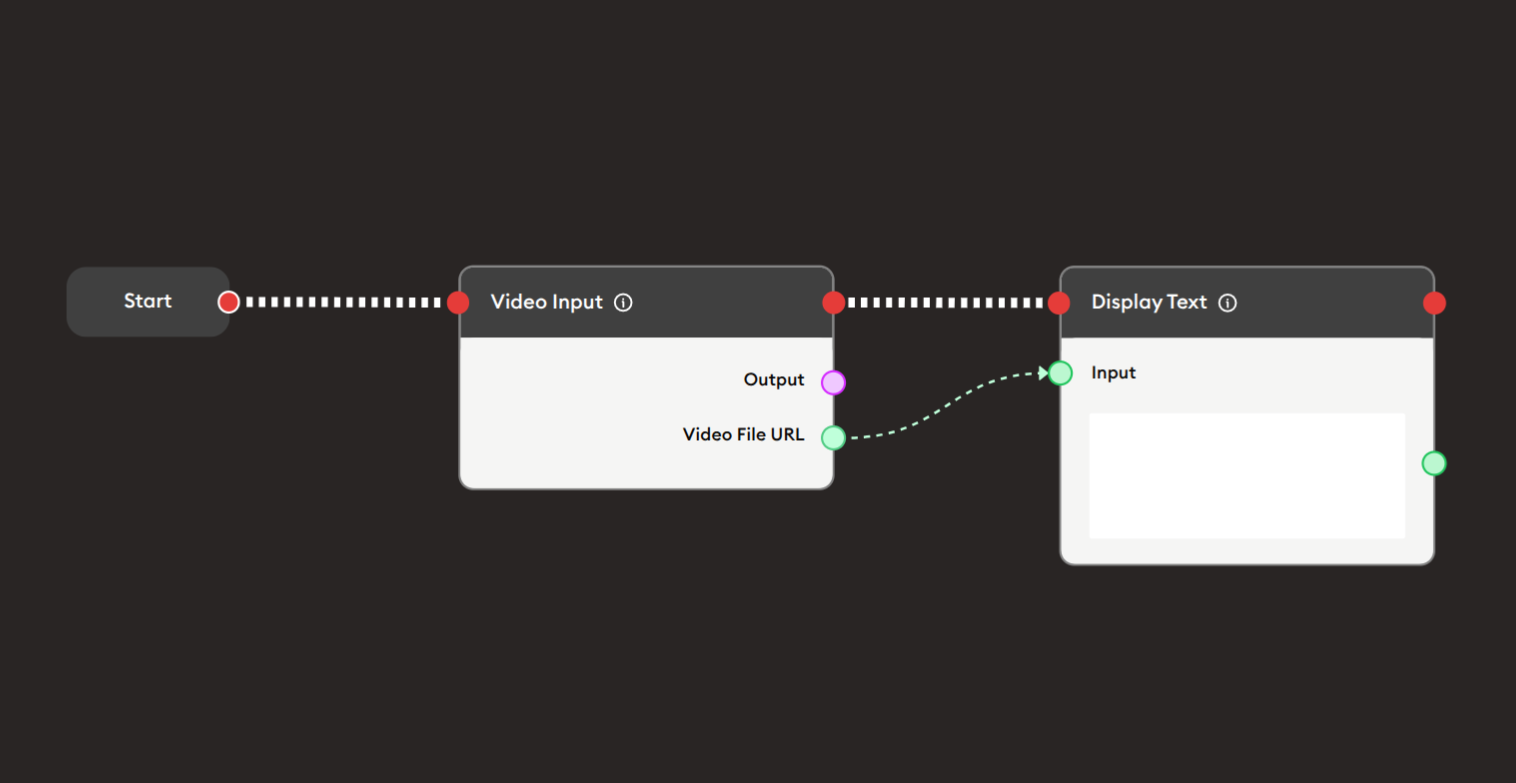
Use the Start Node, Video Input, and Display Text nodes to create a simple video upload workflow.
Inputs
The Video Input node does not accept any inputs as it serves as an entry point for video data in the workflow.
Outputs
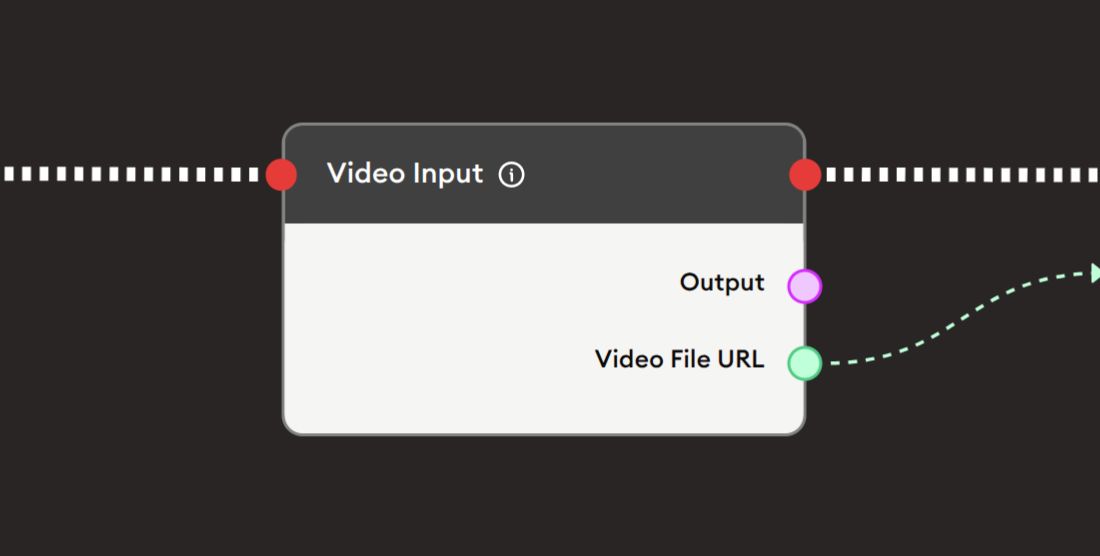
The Video Input node provides the following outputs:
- Output: A general output containing the video file data that can be passed to other nodes for processing.
- Video File URL: The URL of the uploaded video file that can be used for playback, downloading, or referencing in subsequent nodes.
Configuration
The Video Input node requires minimal configuration:
File Upload Area
- Users can click the upload area or drag and drop video files to upload
- Supports common video formats (MP4, AVI, MOV, WebM, MKV, and others depending on system configuration)
- File size limits depend on your system configuration and storage settings
Example Workflows
Video Upload and Display
Scenario: Create a simple workflow where users upload a video and receive the video URL for playback or sharing.
Steps to Create the Flow:
-
Start with the Start Node.
-
Add and connect a Video Input node:
- This node will present an upload interface to users
- Users can drag and drop or click to browse and select a video file
-
Connect the Video File URL output to Display Text node:
- This will display the URL of the uploaded video
- Users can use this URL to access or share the video
Preview:
The system will:
- Display a video upload interface to the user
- Accept the uploaded video file
- Process and store the video
- Generate a URL for accessing the video
- Display the URL in the output
Result: Users can upload videos and immediately receive a URL for accessing or sharing the uploaded content.